SpeedJG Introduction - Tool Bars
As mentioned before all the toolbar buttons will be activated/deactivated in dependency on the Component selected in the tree. That is to say, if a toolbar button is active it refers to the Component currently selected.
To give you a short overview of what these buttons mean and what functionality is associated with them, the events initiated by these buttons are explained below.
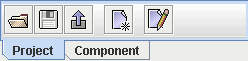
 Open Project
Presents a file dialog you can select a SpeedJG project file from and visualizes the structure of this file within the tree panel.
At this point there is something to say about the structure of the XML meta data. As you can see on the first picture of this page,
the root of this structure begins with SpeedGJ.
Next to the root different projects can be made available, and not until you have opened a project element can you place your GUI
components below them. So the project is the anchor of different GUIs and only a whole project can be saved to the file system;
its file name becomes ProjectName.gpr.
 Save Project
Stores the contents of the project currently selected on the hard disk. This button is activated only if the underlying meta data have been changed.
 Exit Project
Removes the selected project from the tree. If the meta data of the project have been changed, you will be asked to save the contents before closing.
 New Project
When pressed instantiates a new project editor on the Editors Tab.
 Edit Project
Opens a new editor for the Project currently selected on the Editors Tab.
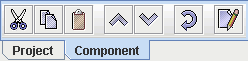
 Cut Component
Removes the Java Component currently selected from the tree structure and stores the contents of this Component (and all of its sub-components) into a separate copy buffer. In addition there is a cut history buffer where up to the last 50 cut components will be stored and from where they can be restored if required.
 Copy Component
Stores the contents of this Component (and all of its sub-components) into a seperate copy buffer.
 Paste Component
Fetches the component structure currently located in the copy buffer and adds this structure to the component structure currently selected in the tree.
 Move Up Component
Changes the order of Components at the same structure level by placing the Component currently selected before the preceding one.
 Move Down Component
Changes the order of Components at the same structure level by placing the Component currently selected after the following one.
 Open Cut-History
Opens a dialog from where a previously cut component structure can be selected. This structure is than stored into the copy buffer from where it can be pasted to any place of the current tree structure.
Edit Component
Opens a new editor for the Component currently selected on the Editors Tab.

 Generate View-Code
Following the model-view controller pattern the view and controller-code generation is separated (the model code is up to you because it is not GUI
specific). When you create this code you see that the controller is given a GUIObject representing the view.
So the controller only sees those components he's interested in and we have a rigid separation of the view and the controller.
 Generate Controller-Code
When activating this button you will first be asked within a little dialog which Listeners to implement for which components. Here you can select any combination of:

|
|
 Generate XML
Prints the readable and parseable structure of the Component currently selected on the XML Panel.
 Check Component
Instantiates a new Component from the selected XML meta-data structure on the fly. If this Component is a JFrame or JDialog it will be shown as a separate window. Otherwise it will be placed on the Check Panel.
Component Editor Buttons
The rest of the toolbar buttons are used to instanciate corresponding Component editors. These editors are customized with regard to the Component to be created. After editing this Component becomes part of the Component currently selected in the tree. So you are able to create the following GUI elements:
 |
||
 JFrame JFrame |
 JDialog JDialog |
 JDesktopPane JDesktopPane |
 JInternalFrame JInternalFrame |
 JMenuBar JMenuBar |
 JMenu JMenu |
 JMenuItem JMenuItem |
 JSeparator JSeparator |
 JRadioButtonMenuItem JRadioButtonMenuItem |
 JCheckBoxMenuItem JCheckBoxMenuItem |
 JPopupMenu JPopupMenu |
 JToolBar JToolBar |
 JToolBar.Separator JToolBar.Separator |
 JPanel JPanel |
 JSplitPane JSplitPane |
 JTabbedPane JTabbedPane |
 JScrollPane JScrollPane |
 Box Box |
 JButton JButton |
 JToggleButton JToggleButton |
 JRadioButton JRadioButton |
 JCheckBox JCheckBox |
 JLabel JLabel |
 JTextField JTextField |
 JFormattedTextField JFormattedTextField |
 JPasswordField JPasswordField |
 JTextArea JTextArea |
 JEditorPane JEditorPane |
 JComboBox JComboBox |
 JSpinner JSpinner |
 JList JList |
 JTable JTable |
 JTree JTree |
 JSlider JSlider |
 JProgressBar JProgressBar |
|

Copyright © 2003 Wöhrmann Softwareentwicklung - Munich Germany